HP LaserJet Pro P1102w Wireless Setup, includes Auto Wireless Connect technology that allows connecting the printer to the wireless network automatically without having to connect any cables or enter wireless network settings such as wireless password or id. All new HP printers will have this capability during the software installation process.
In some cases computers or the network configurations are compatible with HP Auto Wireless Connect. In these cases, an alternate wireless setup method will be offered. To be compatible with HP Auto Wireless Connect, the following conditions must be met: Your computer uses Windows Vista, Windows 7, Windows 8, Mac OS X 10.5 +. Your computer uses a wireless connection to your network and the operating system is in control of the wireless adapter so that the HP Software can retrieve the computer’s current network settings. Your computer is connected to your 802.11b/g/n wireless router over a 2.4 GHz connection.
HP LaserJet Pro P1102 Printers are currently not compatible with 802.11n 5.0 GHz networks.Your computer does not use a static static IP address. Your printer is in HP Auto Wireless Connect mode. The printer will be in this mode for one hour after it is first powered on during installation before it is connected to a network. If your printer has been powered on for more than one hour and the software has not yet tried to connect the printer wireless setup network, you can reset this mode by using the Restore Network Defaults option from the printer control panel. Refer to your printer documentation for how to perform Restore Network Defaults. Other environmental and technical factors may also affect whether HP Auto Wireless Connect is offered.
HP LaserJet Pro P1102w Wireless Setup Network
Additional advanced settings are available from the printer’s home page (embedded web server or EWS). For more information, see Embedded web server.
This section contains the following topics:
● Set up the printer for wireless communication
● Change network settings
● Use HP wireless direct
Set up the printer for wireless communication
● Before you begin
● Set up the printer on your wireless network
● Change the connection type
● Test the wireless connection
● Turn on or off the wireless capability of the printer
NOTE: If you encounter problems connecting the printer, see Unable to connect the printer
wirelessly.
TIP: For more information about setting up and using the printer wirelessly, visit the HP Wireless Printing Center (www.hp.com/go/wirelessprinting).
Before you begin
Ensure the following:
● The printer is not connected to the network using an Ethernet cable.
● The wireless network is set up and working properly.
● The printer and the computers that use the printer are on the same network (subnet). While connecting the printer, you might be prompted to enter the wireless network name (SSID) and a wireless password.
● The wireless network name is the name of your wireless network.
● The wireless password prevents other people from connecting to your wireless network without your permission. Depending on the level of security required, your wireless network might use either a WPA passphrase or WEP key.
If you have not changed the network name or the security passkey since setting up your wireless network, you can sometimes find them on the back or side of the wireless router.
If you cannot find the network name or the security password or cannot remember this information, see the documentation provided with your computer or with the wireless router. If you still cannot find this information, contact your network administrator or the person who set up the wireless network.
Set up the printer on your wireless network
Use the Wireless Setup Wizard from the printer control panel display to set up wireless
communication.
NOTE: Before you proceed, go through the list at Before you begin.
1. From the printer control panel, touch Setup.
2. Touch Network Setup.
3. Touch Wireless Settings.
4. Touch Wireless Setup Wizard.
5. Follow the display instructions to complete the setup.
If you are already using the printer with a different type of connection, such as a USB connection, follow the instructions in Change the connection type to set up the printer on your wireless network.
Change the connection type
After you have installed the HP printer software and connected the printer to your computer or to a network, you can use the software to change the connection type (for example, from a USB connection to a wireless connection).
NOTE: Connecting an Ethernet cable turns off the wireless capability of the printer.
To change from an Ethernet connection to a wireless connection (Windows)
1. Remove the Ethernet cable from the printer.
2. Run the Wireless Setup Wizard to make the wireless connection. For more information, see Set up the printer on your wireless network.
Open the printer software after the installation. For more information, see Open the HP printer software (Windows).
To change from a USB connection to a wireless network (Windows)
Before you proceed, go through the list at Before you begin.
1. Depending on your operating system, do one of the following:
Windows 8.1: Click the down arrow in lower left corner of the Start screen, select the printer name, and then click Utilities.
Windows 8: Right-click an empty area on the Start screen, click All Apps on the app bar, select the printer name, and then click Utilities.
Windows 7, Windows Vista, and Windows XP: From the computer desktop, click Start, select All Programs, click HP, click the folder of your printer.
2. Click Printer Setup & Software.
3. Select Convert a USB connected printer to wireless. Follow the on-screen instructions.
Learn more about how to change from a USB to wireless connection. Click here to go online
for more information. At this time, this website might not be available in all languages.
HP LaserJet Pro P1102w wireless connection to a USB or Ethernet connection (Windows)
Connect the USB or Ethernet cable to the printer.
To change from a wireless connection to a USB or Ethernet connection (OS X)
Add the printer to the print queue.
1. Open System Preferences.
2. Depending on your operating system, click Print & Fax, Print & Scan, or Printers & Scanners in the Hardware section.
3. Click + below the list of printers at the left.
4. Select the printer from the list of detected printers, and click Add.
Test the wireless connection
Print the wireless test report for information about the printer wireless connection. The wireless test report provides information about the printer status, hardware (MAC) address, and IP address. If the printer is connected to a network, the test report displays details about the network settings.
To print the wireless test report
1. From the printer control panel, touch (the Wireless button), and then touch (the Settings
button).
2. Touch Print Reports
3. Touch Wireless Test Report.
Turn on or off the wireless capability of the printer
The blue Wireless light on the printer control panel is lit when the wireless capability of the printer is on.
Connecting an Ethernet cable to the printer automatically turns off the wireless capability and the Wireless light.
1. From the printer control panel, touch Setup and then touch Network Setup.
2. Touch Wireless Settings.
3. Touch Wireless to turn it on or off.
Change network settings
From the printer control panel, you can set up and manage your printer’ wireless connection and perform a variety of network management tasks. This includes viewing and changing network settings, restoring network defaults, and turning the wireless function on or off.
CAUTION: Network settings are provided for your convenience. However, unless you are an
advanced user, you should not change some of these settings (such as the link speed, IP settings, default gateway, and firewall settings).
To print network settings
Use one of the following ways:
● From the printer control panel, touch (Wireless) or (Ethernet). The network status screen is displayed. Select Print Details to print the network configuation page.
● Print the network configuration page. For more information, see Network configuration page.
HP LaserJet Pro P1102w Setup Link Speed
You can change the speed at which data is transmitted over the network. The default is Automatic.
1. From the printer control panel, touch Setup and then touch Network Setup.
2. Touch Ethernet Settings.
3. Select Advanced Settings.
4. Touch Link Speed.
5. Touch the appropriate option that matches your network hardware.
HP LaserJet Pro P1102w IP settings
The default IP setting for the IP settings is Automatic, which sets the IP settings automatically. If you are an advanced user and want to use different settings (such as the IP address, subnet mask, or the default gateway), you can change them manually.
Be careful when manually assigning an IP address. If you enter an invalid IP address during the installation, your network components cannot connect with the printer.
1. From the printer control panel, touch Setup and then touch Network Setup.
2. Touch Ethernet Settings or Wireless Settings.
3. Touch Advanced Settings.
4. Touch IP Settings.
5. A message appears warning that changing the IP address removes the printer from the network. Touch OK to continue.
6. Automatic is selected by default. To change the settings manually, touch Manual, and then enter the appropriate information for the following settings:
● IP Address
● Subnet Mask
● Default Gateway
● DNS Address
7. Enter your changes, and then touch Done.
8. Touch OK.
HP LaserJet Pro P1102w Wireless Direct
With HP wireless setup direct, you can print wirelessly from a computer, smart phone, tablet, or other wireless capable device without connecting to an existing wireless network.
Guidelines when using HP wireless direct
● Make sure your computer or mobile device has the necessary software.
If you are using a computer, make sure you have installed the printer software provided with the printer.
● If you have not installed the HP printer software on the computer, connect to HP wireless direct first and then install the printer software. Select Wireless when prompted by the printer software for a connection type.
● If you are using a mobile device, make sure you have installed a compatible printing app. For more information about mobile printing, visit http://www.hp.com/global/us/en/eprint/
mobile_printing_apps.html.
● Make sure HP wireless direct is turned on in the printer and, if necessary, security is enabled.
● Up to five computers and mobile devices can use the same HP wireless direct connection.
● HP wireless direct can be used while the printer is also connected either to a computer using a USB cable or to a network using a wireless connection.
● HP wireless direct cannot be used to connect a computer, mobile device, or printer to the
Internet.
HP LaserJet Pro P1102w Turn On Wireless Direc
1. From the printer control panel, touch (HP wireless direct).
2. Touch On for HP Wireless Direct.
TIP: If you would like to use HP wireless direct with greater security and if the computer or
mobile device supports WPA2 encryption, touch Security to enable or disable security. With
security enabled, only users with the password can connect wirelessly to the printer. Without enabling security, anyone with a wireless device within the wireless range of the printer can connect to the printer.
3. Touch HP Wireless Direct Name to display the HP wireless direct name.
4. If you have enabled security, touch Security Password to display the HP wireless direct
password.
TIP: You can also turn on HP wireless direct from the EWS. For more information about using the EWS, see Embedded web server.
To print from a wireless-capable mobile device
Make sure you have installed a compatible printing app on your mobile device.
1. Make sure you have turned on HP wireless direct on the printer.
2. Turn on the Wi-Fi connection on your mobile device. For more information, see the
documentation provided with the mobile device. If your mobile device does not support Wi-Fi, you are not able to use HP wireless direct.
3. From the mobile device, connect to a new network. Use the process you normally use to
connect to a new wireless network or hotspot. Choose the HP wireless direct name from the list of wireless networks shown such as HP-Print-**-Officejet Pro XXXX (where ** are the unique characters to identify your printer and XXXX is the printer model located on the printer). If HP wireless direct is turned on with security, enter the password when prompted.
4. Print your document.
HP LaserJet Pro P1102w Print from a wireless-capable computer (Windows)
1. Make sure you have turned on HP wireless direct on the printer.
2. Turn on the computer’s Wi-Fi connection. For more information, see the documentation provided with the computer. If your computer does not support Wi-Fi, you are not able to use HP wireless direct.
3. From the computer, connect to a new network. Use the process you normally use to connect to a new wireless network or hotspot. Choose the HP wireless direct name from the list of wireless networks shown such as HP-Print-**-Officejet Pro XXXX (where ** are the unique characters to identify your printer and XXXX is the printer model located on the printer). If HP wireless direct is turned on with security, enter the password when prompted.
4. Proceed to step 5 if the printer has been installed and connected to the computer over a wireless network.
If the printer has been installed and connected to your computer with a USB cable, follow the steps below to install the printer software using the HP HP wireless direct connection.
a. Depending on your operating system, do one of the following:
● Windows 8.1: Click the down arrow in lower left corner of the Start screen, select the
printer name, and then click Utilities.
● Windows 8: Right-click an empty area on the Start screen, click All Apps on the app
bar, select the printer name, and then click Utilities.
● Windows 7, Windows Vista, and Windows XP: From the computer desktop, click Start,
select All Programs, click HP, click the folder of your printer.
b. Click Printer Setup & Software, and then select Connect a new printer.
c. When the Connection Options software screen appears, select Wireless. Select your HP printer software from the list of detected printers.
d. Follow the on-screen instructions.
5. Print your document.
To print from a wireless-capable computer (OS X)
1. Make sure you have turned on HP wireless direct on the printer.
2. Turn on Wi-Fi on the computer.
For more information, see the documentation provided by Apple.
3. Click the Wi-Fi icon and choose the HP wireless direct name, such as HP-Print-**- Officejet Pro XXXX (where ** are the unique characters to identify your printer and XXXX is the printer model located on the printer). If HP wireless direct is turned on with security, enter the password when prompted.
4. Add the printer.
a. Open System Preferences.
b. Depending on your operating system, click Print & Fax, Print & Scan, or Printers &
Scanners in the Hardware section.
c. Click + below the list of printers at the left.
d. Select the printer from the list of detected printers (the word “Bonjour” is listed the right column beside the printer name), and click Add.
9 Printer Management Tools
Toolbox (Windows)
The Toolbox provides maintenance information about the printer.
NOTE: The Toolbox can be installed from the HP Software CD if the computer meets the system requirements. System requirements can be found in the Readme file, which is available on the HP printer software CD provided with your printer.
To open the Toolbox
1. Depending on your operating system, do one of the following:
● Windows 8.1: Click the down arrow in lower left corner of the Start screen, and then select the printer name.
● Windows 8: Right-click an empty area on the Start screen, click All Apps on the app bar, and then select the printer name.
● Windows 7, Windows Vista, and Windows XP: From the computer desktop, click Start,
select All Programs, click HP, click the folder for the printer, and then select the icon with the printer’s name.
2. Click Print, Scan & Fax.
3. Click Maintain Your Printer.
HP Utility (OS X)
HP Utility contains tools to configure print settings, calibrate the printer, order supplies online, and find website support information.
NOTE: The features available in HP Utility vary depending on the selected printer.
Ink level warnings and indicators provide estimates for planning purposes only. When you receive a low-ink warning message, consider having a replacement cartridge available to avoid possible printing delays. You do not need to replace cartridges until the print quality becomes unacceptable. Double-click HP Utility in the Hewlett-Packard folder in the Applications folder at the top level of the hard disk.
HP LaserJet Pro P1102w Embedded web server
When the printer is connected to a network, you can use the printer’s embedded web server (EWS) to view status information, change settings, and manage it from your computer.
However, some features are not available.
● About cookies
● Open the embedded web server
● Control panel lock
● Embedded web server cannot be opened
About cookies
The embedded Web server (EWS) places very small text files (cookies) on your hard drive when you are browsing. These files let the EWS recognize your computer the next time you visit. For example, if you have configured the EWS language, a cookie helps remember which language you have selected so that the next time you access the EWS, the pages are displayed in that language. Some cookies (such as the cookie that stores customer-specific preferences) are stored on the computer until you clear them manually.
You can configure your browser to accept all cookies, or you can configure it to alert you every time a cookie is offered, which allows you to decide which cookies to accept or refuse. You can also use your browser to remove unwanted cookies.
Depending on your printer, if you disable cookies, you also disable one or more of the following features:
● Using some setup wizards
● Remembering the EWS browser language setting
● Personalizing the EWS Home page
For information about how to change your privacy and cookie settings and how to view or delete cookies, see the documentation available with your Web browser.
Open the embedded web server
You can access the embedded web server through either a network or HP wireless direct.
To open the embedded web server through a network
1. Find out the IP address or hostname of the printer from the network configuration page.
For more information, see Network configuration page.
2. In a supported web browser on your computer, type the IP address or hostname assigned to the printer.
For example, if the IP address is 123.123.123.123, type the following address into the web
browser: http://123.123.123.123
To open the embedded web server through HP wireless direct
1. Touch (HP wireless direct) from the printer control panel display.
2. If the display shows that HP wireless direct is Off, touch HP Wireless Direct to turn it on.
3. From your wireless computer, turn wireless on, search for and connect to the HP wireless direct name. If you have HP wireless direct security on, enter the HP wireless direct password when prompted.
4. In a supported web browser on your computer, type the following address: http://
192.168.223.1.
Control panel lock
To prevent unauthorized use of certain features on the printer control panel, you can lock the features from the embedded web server (EWS). Once the control panel lock is turned on, certain features will not be accessible from the control panel.
The setting for control panel lock itself can also be secured by setting an administrator password in EWS. The password must be entered when accessing the setting for turning on or off the control panel lock.
Embedded web server cannot be opened
1.Check your network setup
● Make sure you are not using a phone cord or a crossover cable to connect the printer to the network.
● Make sure the network cable is securely connected to the printer.
● Make sure the network hub, switch, or router is turned on and working correctly.
Check the computer
● Make sure the computer that you are using is connected to the network.
You may also access the EWS if the printer’s HP wireless direct is turned on, and you
know the printer’s IP address.
Check your web browser
● Make sure the web browser meets the minimum system requirements. For more information, see system requirements in the printer’s Readme file found on the HP printer software CD.
● If your web browser uses any proxy settings to connect to the Internet, try turning off these settings. For more information, see the documentation available with your web browser.
● Make sure JavaScript and cookies are enabled in your web browser. For more information, see the documentation available with your web browser.
Check the printer IP address
● To check the IP address of the printer, obtain the IP address by printing a network configuration page. From the printer control panel display, touch Setup, touch Reports, and then touch
Network Configuration Report.
Ping the printer using the IP address from the command prompt (Windows) or from Network Utility (OS X). OS X Lion and OS X Mountain Lion: Network Utility is located in the Utilities folder in the Applications folder at the top level of the hard disk.OS X Mavericks: Open Finder, hold down the Option key and choose System Information from the Apple ( ) menu. Choose Window > Network Utility.
For example, if the IP address is 123.123.123.123, type the following at the command prompt
(Windows): C:\ping 123.123.123.123 Or In Network Utility (OS X), click the Ping tab, type the 123.123.123.123 in the box, and then click Ping.
If a reply appears, the IP address is correct. If a time-out response appears, the IP address is incorrect.
If HP LaserJet Pro P1102w Auto Wireless Connect is offered during the installation of your printer, it is the recommended setup method. Part of the setup process requires your computer to be temporarily disconnected from your wireless network. During this time you will not have Internet access. Be sure to save any online work and/or downloads before continuing with this setup method. To use this option, install the software for your printer and follow the onscreen instructions.
When prompted, select the “Network (Ethernet/Wireless)” connection type and then choose “Yes, send my wireless settings to the printer (recommended)”. That’s it! The HP software will do the rest. If HP Auto Wireless Connect is not offered during the software installation or if it is not successful, you will be guided to use another wireless setup method.
 HTC 10 Connecting to a Wi-Fi network
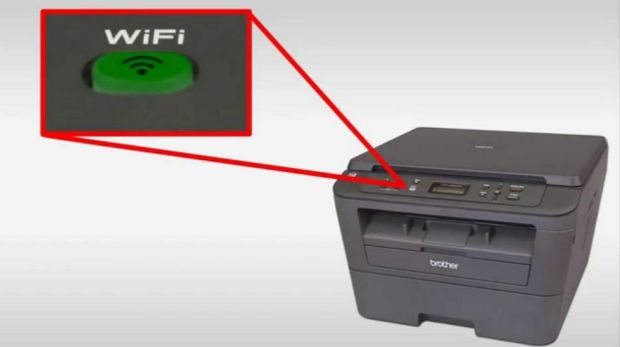 How to Configure Your Brother HL-L2340DW Wireless Network Using the One Push Method of WPS or AOSS
 HP LaserJet Pro M277 Setup Web Services using the printer control panel
